Adding Widget to a Classic Console
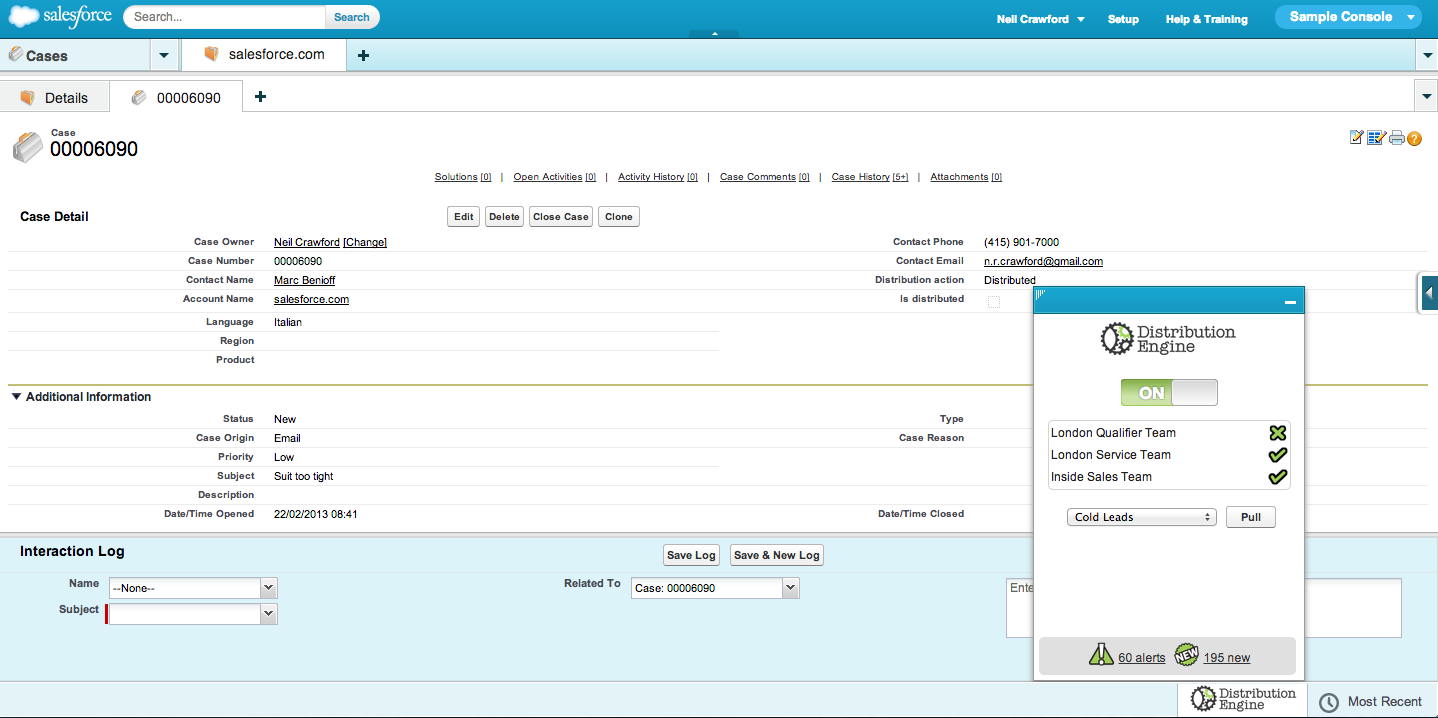
If you are using the Sales or Service Cloud Console you can use the Distribution Engine Widget in the console. This enables agents to toggle their availability, view their current status within teams…
If you are using the Sales or Service Cloud Console you can use the Distribution Engine Widget in the console. This enables agents to toggle their availability, view their current status within teams and use pull distributors to request extra work.
Creating a custom console component
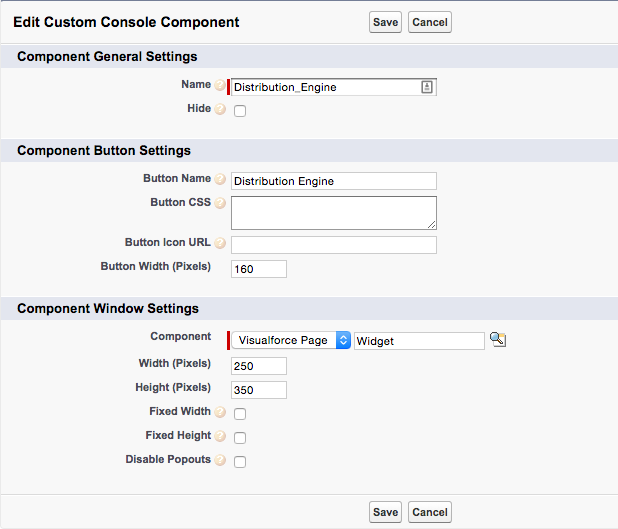
1. Create the Custom Console Component by going to Setup > Customize > Custom Console Components and clicking New
Enter the following fields. Leave all other fields blank.
Component General Settings
- Name - enter Distribution_Engine for the component name
Component Button Settings
- Button Name - enter Distribution Engine for the component label. Note this will be overwritten with the Distribution Engine logo when the component loads.
- Button width - this should be 160
Component Window Settings
- Component - select the Widget page.
- Width - the width of the widget once opened. We recommend 250.
- Height - the height of the widget once opened. We recommend 350.
Making the custom console component visible
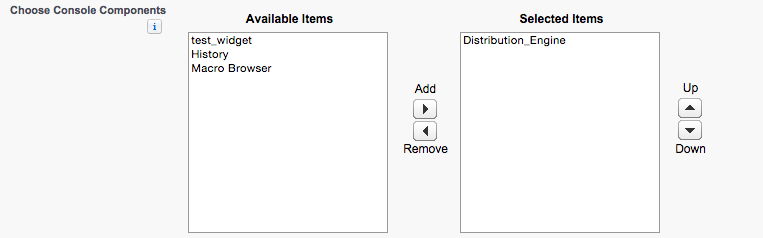
Modify your Service Cloud Console App to include the new Service Cloud Custom Console Component. Setup > Create > Apps and Edit the relevant App.
In the Choose Console Components Section select Distribution_Engine from the Available list and hit Save.
How did we do?
Adding Widget to Salesforce Mobile
Adding Widget to Classic Homepage