Assign on Action
There are a few different ways to manually trigger distribution, one is the manual distribution feature, or you can use the Trigger Distribution API to initiate assignment using trigger distributors…

There are a few different ways to manually trigger distribution, one is the manual distribution feature, or you can use the Trigger Distribution API to initiate assignment using trigger distributors and a Salesforce Flow.
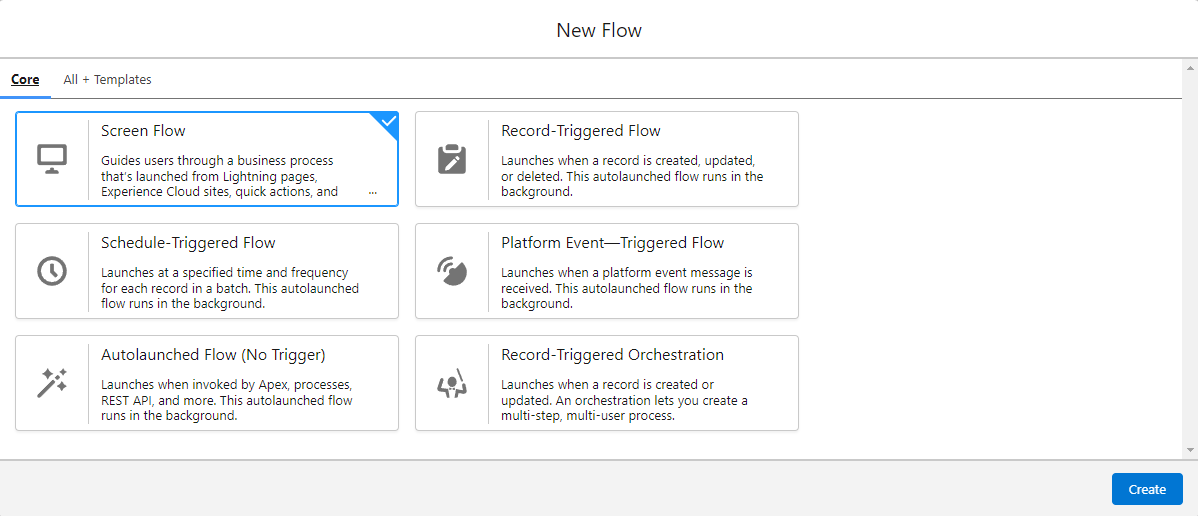
Step 1 - Create the flow
- Go to Setup > Process Automation > Flows
- Click New Flow
- Select "Screen Flow"
- Click Create
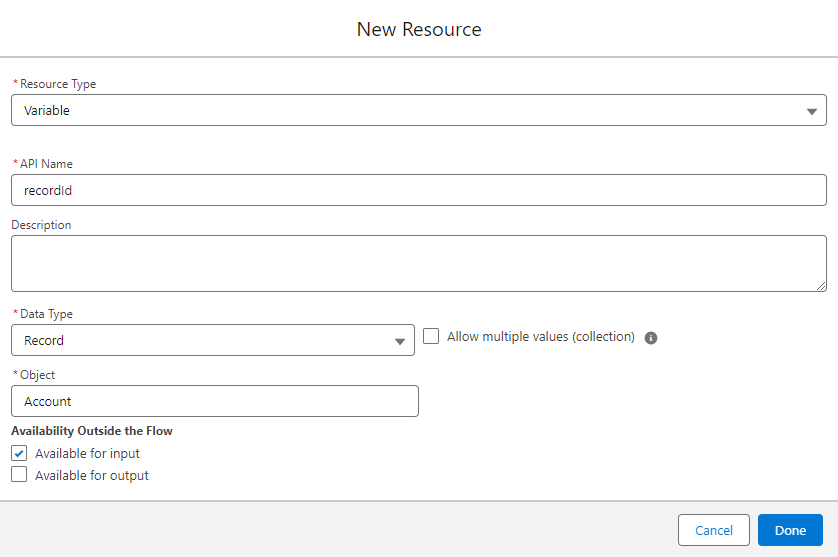
Step 2 - Add record id resource
In order to pass in a record to a screen flow, a resource needs to be created with the name "recordId".
- In the Toolbox on the left, click New Resource
- Resource Type: Variable
- API Name: recordId
- Data Type: Record
- Object: The relevant object type
- Available for input: Check
- Click Done
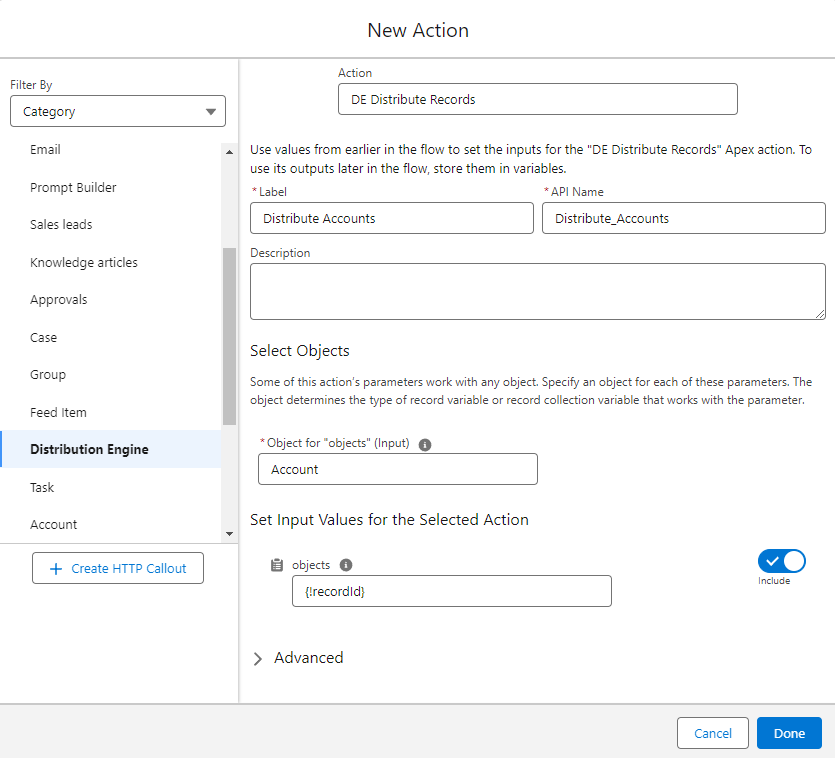
Step 3 - Distribute the record
This step uses the DE Trigger Distribution API, see this article for more information.
- Click the Add Element button and select "Action"
- In the category "Distribution Engine" search for the action "DE Distribute Records"
- Label: Distribute Accounts
- Object for "objects": Select the relevant object type
- objects: {!recordId}
- Click Done
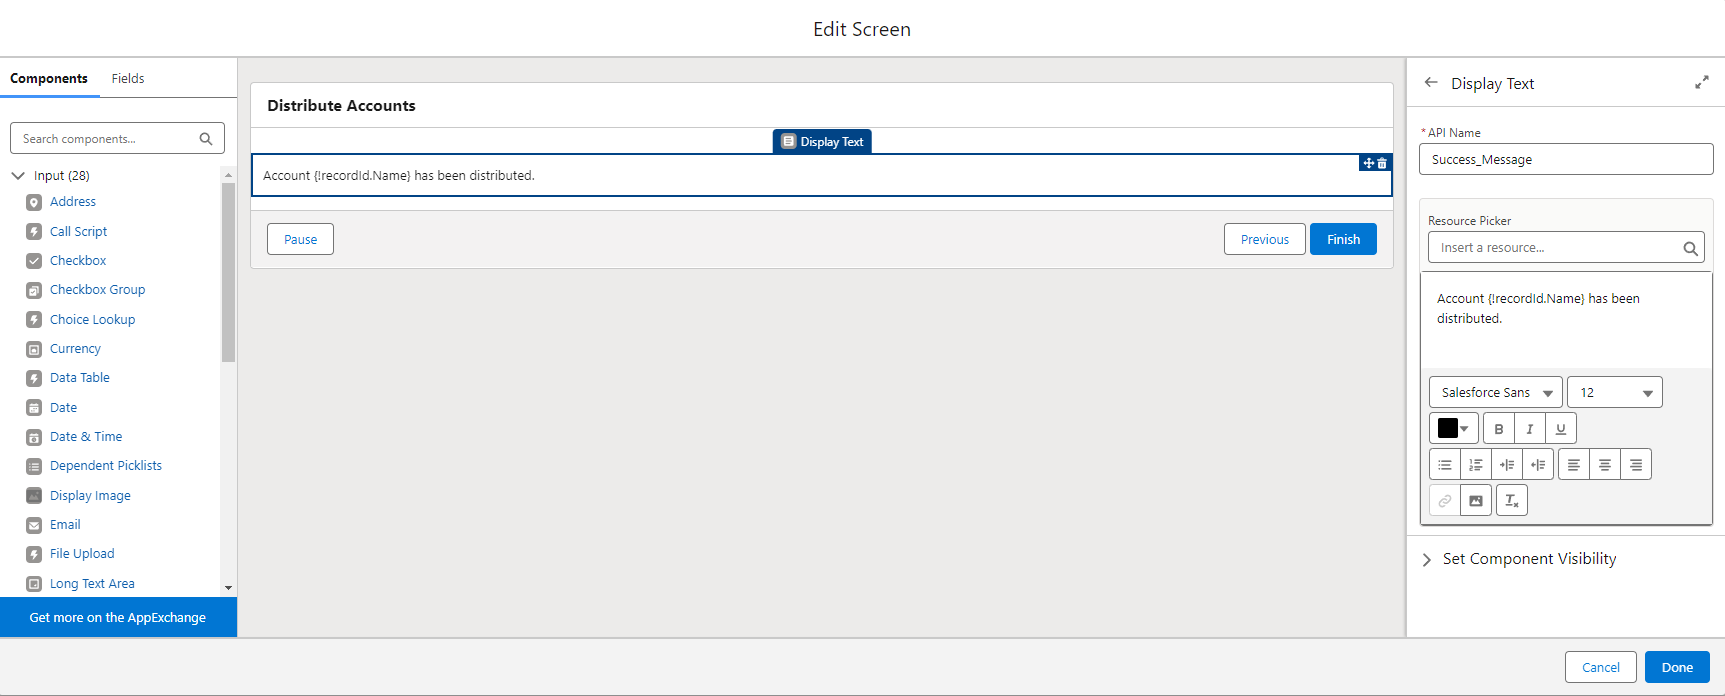
Step 4 - Create the success screen
It's up to you what you want to include on the screen. It could show details of the distributed record, or it could prompt further actions.
For this example we will just configure the flow screen to tell you user that the record has been distributed.
- Click the Add Element button and select "Screen"
- Label: Distribution Succeeded
- Select "Display Text" from the Components on the left
- API Name: Success_Message
- Contents: Account {!recordId.Name} has been distributed.
- Click Done
Step 5 - Display errors
There are some reasons why the distribution process may fail. Due to this, it is useful to handle these errors and inform the user why something failed. In this example we will display the errors on the screen.
- Click the Distribute Accounts action and select "Add Fault Path"
- On the fault path click the Add Element button and select "Screen"
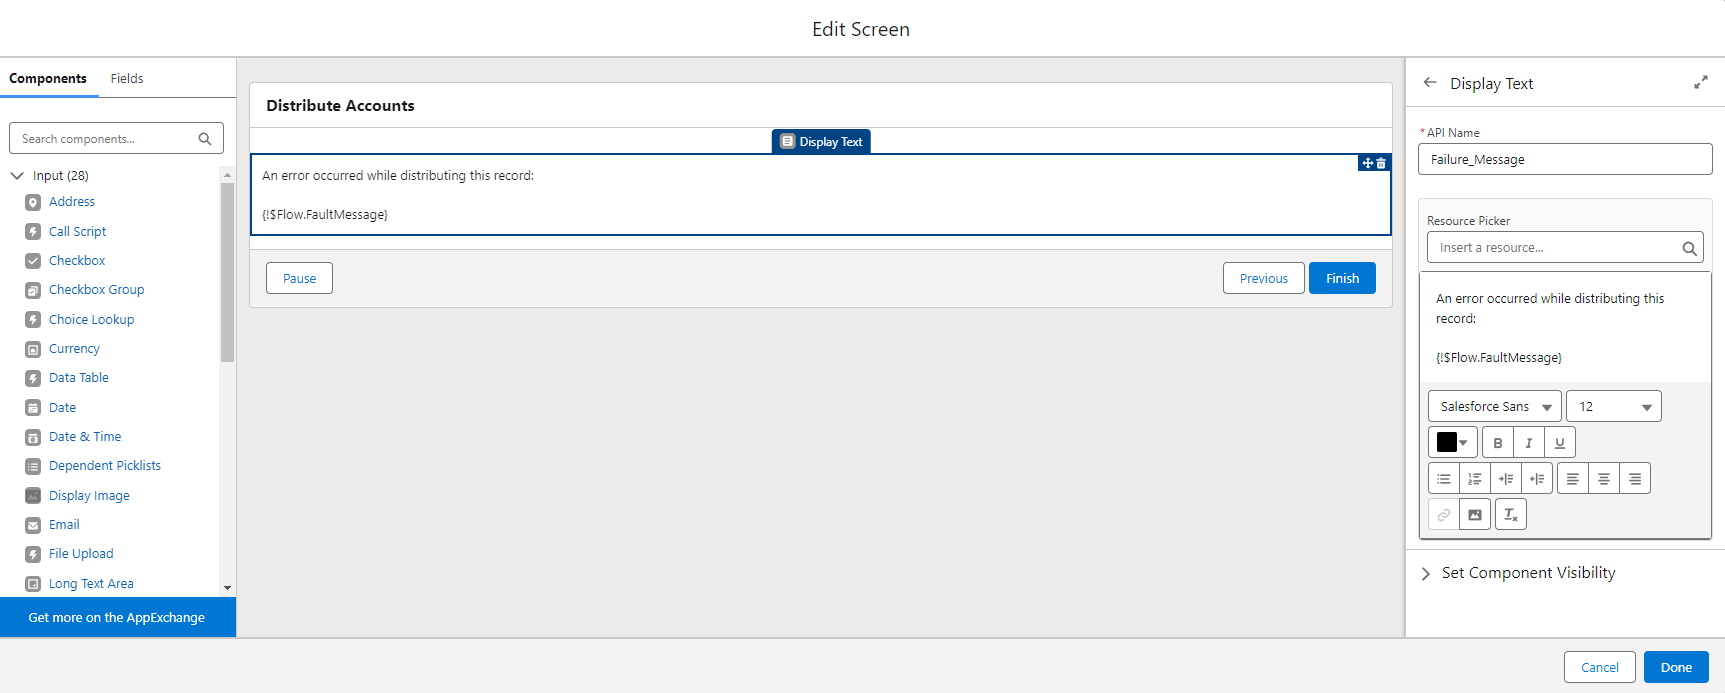
- Label: Distribution Failed
- Select "Display Text" from the Components on the left
- API Name: Failure_Message
- Contents: An error occurred while distributing this record: {!$Flow.FaultMessage}
- Click Done
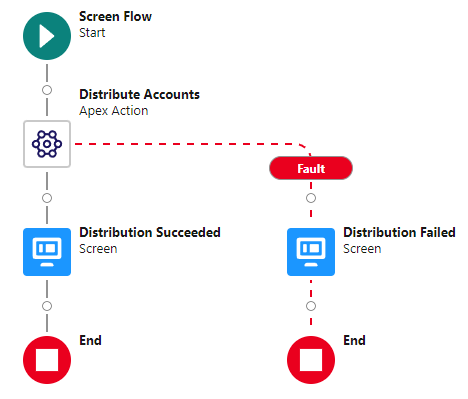
- You will end up with the following Flow
Step 6 - Save the flow
- Click Save on the toolbar
- Flow Label: Distribute Accounts
- Click Save
- Click Activate on the toolbar
Step 7 - Trigger the flow
The flow can by triggered in a few different ways, one option is to create an action button and add it to the page.
- Go to Setup > Object Manager
- Select the relevant object type
- Click Buttons, Links and Actions
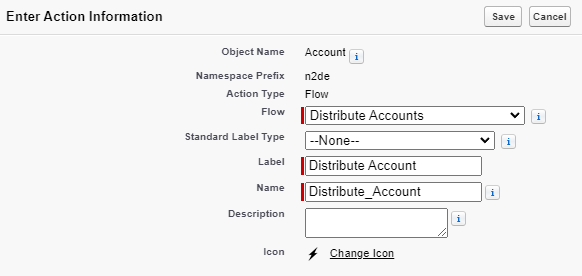
- Click New Action
- Action type: Flow
- Flow: Distribute Accounts
- Label: Distribute Account
- Click Save
- Back in the object manager, click Page Layouts
- Select which layout you want to add the button to
- If not already done, click the "override the predefined actions" link in the "Salesforce Mobile and Lightning Experience Actions" section
- In the actions bar at the top select "Mobile & Lightning Actions"
- Drag the Distribute Account button onto the "Salesforce Mobile and Lightning Experience Actions" section
- Click Save
How did we do?
Classify on Address Change