Desktop or Mobile Notifications
The steps below show you how you can create a Salesforce Flow to send a custom desktop or mobile notification to a user on assignment of a record in DE. This uses the Notification Builder functionali…
The steps below show you how you can create a Salesforce Flow to send a custom desktop or mobile notification to a user on assignment of a record in DE. This uses the Notification Builder functionality within Salesforce and more information can be found here.

Note: the labels used in the example are just suggestions, you can set them to whatever you like.
Step 1 - Create the notification
- Go to Setup > Notification Builder > Custom Notifications
- Click New
- Depending on your configuration, you may have multiple notification types to choose from. If prompted, select "Salesforce Desktop or Mobile" and click Next
- Custom Notification Name: DE Notification
- Support Channels: <Choose at least one>
- Click Save
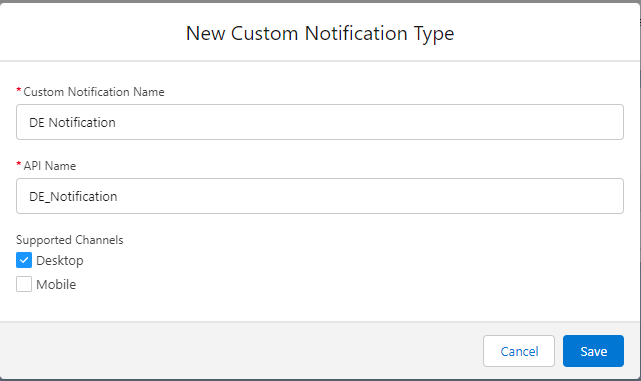
You need the 'API Name' of the notification created in this step to use in the Flow later, so remember what was used. In this example it is 'DE_Notification'
Step 2 - Create the flow
- Go to Setup > Process Automation > Flows
- Click New Flow
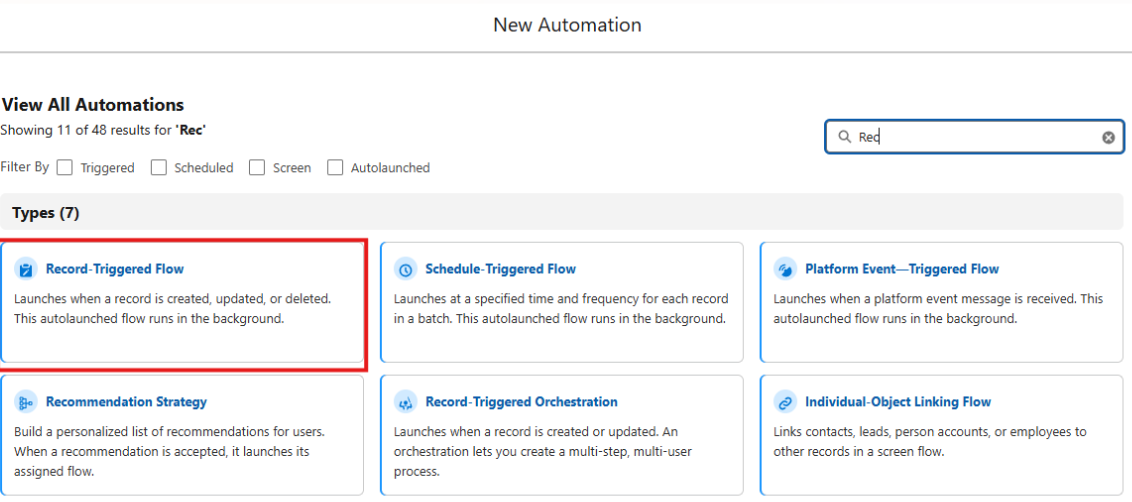
- Select "Record-Triggered Flow"
Step 3 - Configure Start
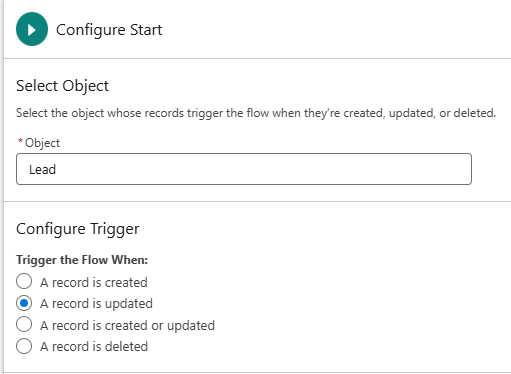
- After the Flow Builder loads, the 'Start' element will be selected. On the right, the options for 'Configure Start' are available.
- Choose the object being assigned in the 'Object' box. In this example, we have chosen 'Lead'
- Choose 'A record is updated'
- Set the Entry Conditions as 'All Conditions are met (AND)' with the field as Owner ID, operator 'Is Changed' value 'True'.
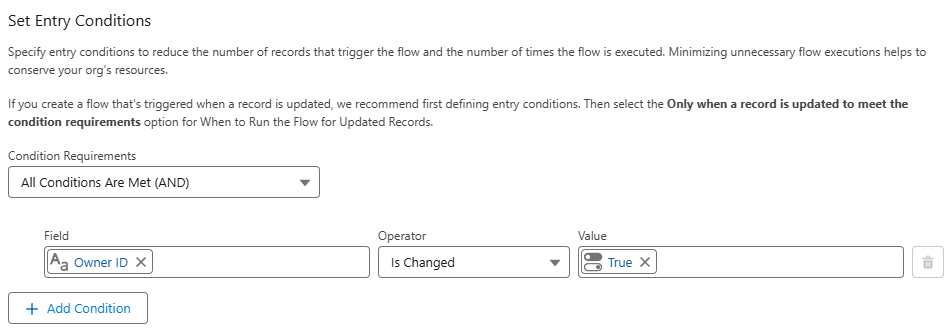
- Leave 'When to run the Flow for updated records' as 'Every time a record is updated and meets the condition requirements'
Step 4 - Check that Owner is a User
- This step is only required if the object being assigned can be owned by a Queue in Salesforce.
- Click the Add Element button in the main window and select "Decision"
- Label: Is Owner a user
- Leave the logic as 'Manually Set Conditions'
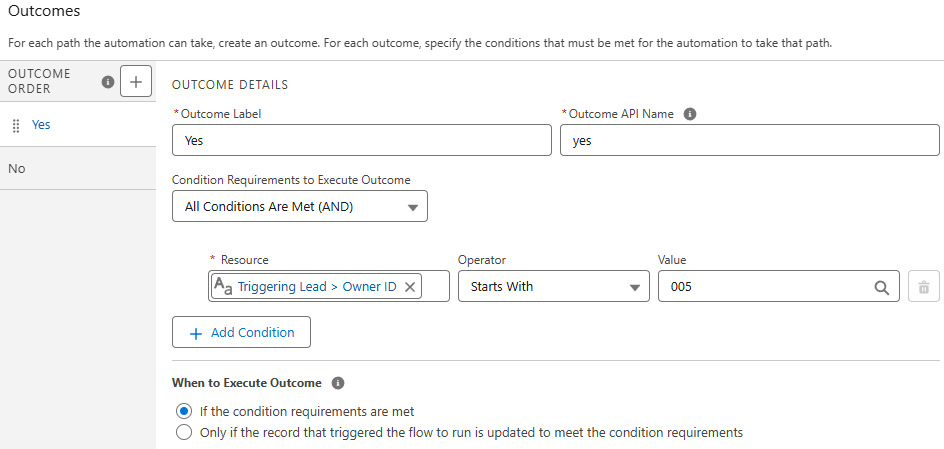
- Outcome details Label: 'Yes'
- Condition Resource: Triggering Lead > Owner ID
- Condition Operator: 'Starts With'
- Condition Value: '005'
Step 5 - Create the recipients variable
The notification action requires a list of recipients, but because we only have one as the 'Owner ID' we need to convert that to a list.
- In the Toolbox on the left, click New Resource
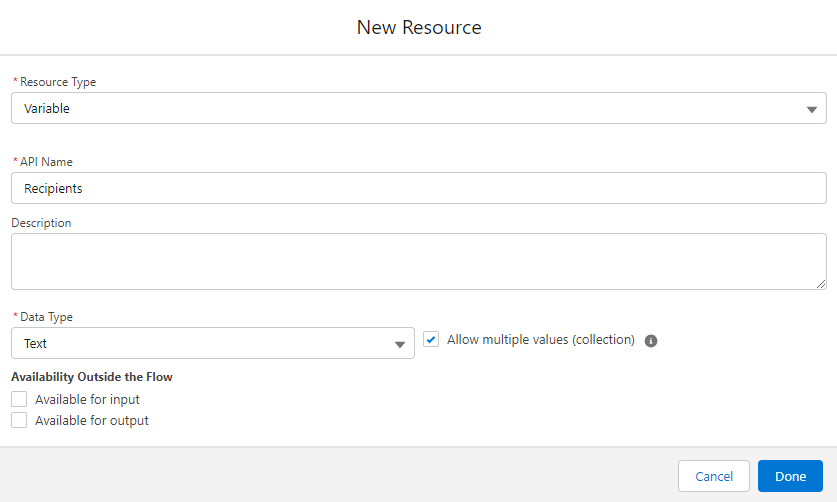
- Resource Type: Variable
- API Name: Recipients
- Data Type: Text
- Allow multiple values (collection): Check
- Click Done
Step 6 - Populate the recipients
- In the "Yes" branch after 'Is Owner a user', click the Add Element button and select "Assignment"
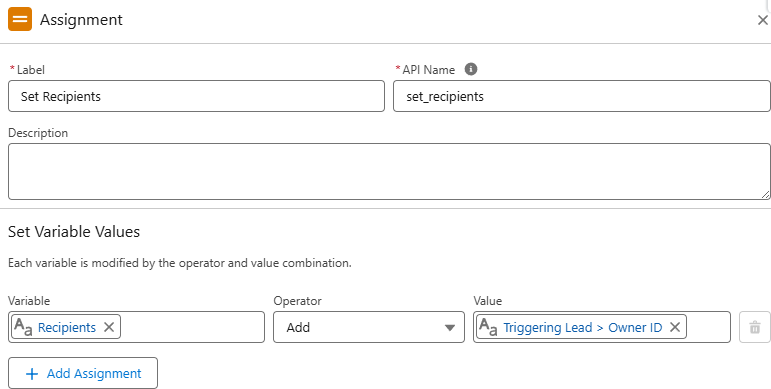
- Label: Set Recipients
- Variable: {!Recipients}
- Operator: Add
- Value: Triggering Lead > Owner ID
Step 7 - Get the Custom Notification type
- In the "Yes" branch after 'Add user to Collection', click the Add Element button and select 'Get Records'
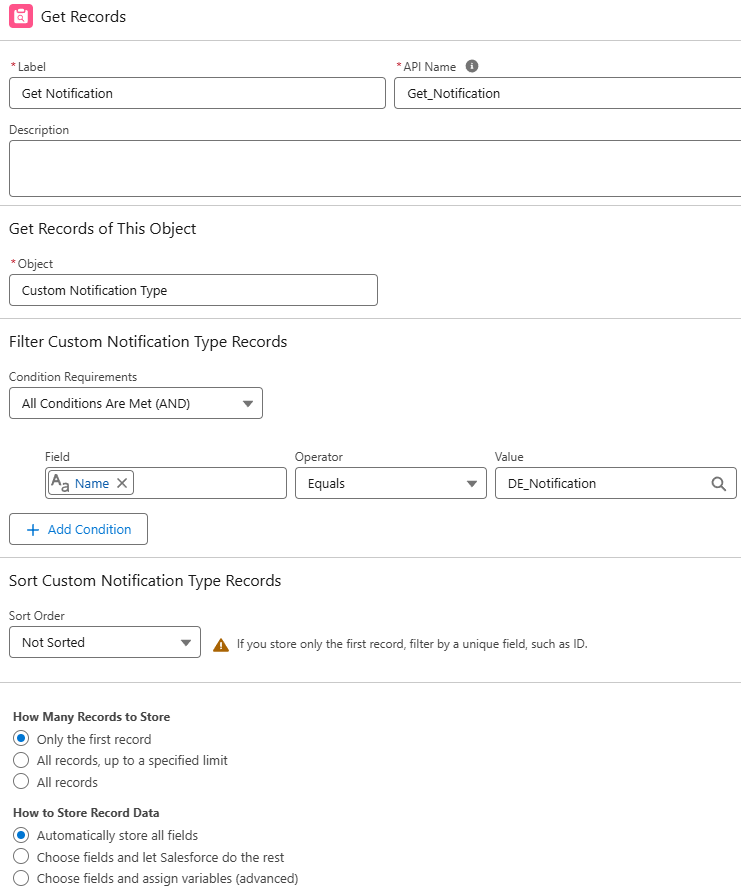
- Label: Get Notification
- Object: Custom Notification Type
- Field: DeveloperName
- Operator: Equals
- Value: DE_Notification
- The value here depends on what the Notification was labeled in Step 1.
- The value here depends on what the Notification was labeled in Step 1.
Step 8 - Send the notification
- In the "Yes" branch, click the Add Element button and select "Action"
- Search for the Action "Send Custom Notification"
- Label: Send Notification
- Custom Notification Type ID: {!Get_Notifications.Id}
- This is the resource from 'Get Notifications' from Step 7
- Notification Body
- Within the options, choose 'New Resource' to open a new window for creating a resource for the flow.
- Resource type: Formula
- API Name: Body
- Data Type: Text
- Within the 'Formula' for this example, we've entered 'Click to open'. This will be the body of the notification message. You can insert fields from the triggering record to make it more dynamic.
- Click 'Done'. The new resource will auto-populate in the Notification Body field.
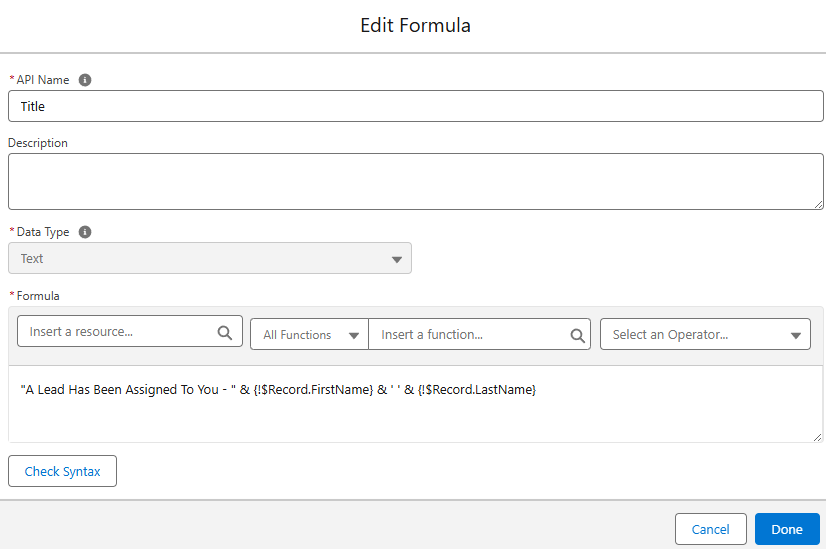
- Notification Title
- Similar to 'Notification Body', choose 'New Resource'
- Resource type: Formula:
- API Name: Title
- Within the 'Formula' for this example we've entered
- 'A Lead Has Been Assigned To You - ' & {!$Record.FirstName} & ' ' & {!$Record.LastName}
- This will include the name of the lead that was assigned in the title of the notification.
- Click 'Done'. The new resource will auto-populate in the Notification Title field.
- Recipient IDs: {!Recipients}
- This is the Recipients collection variable created earlier in Step 6.
- Target ID: {!$Record.Id}

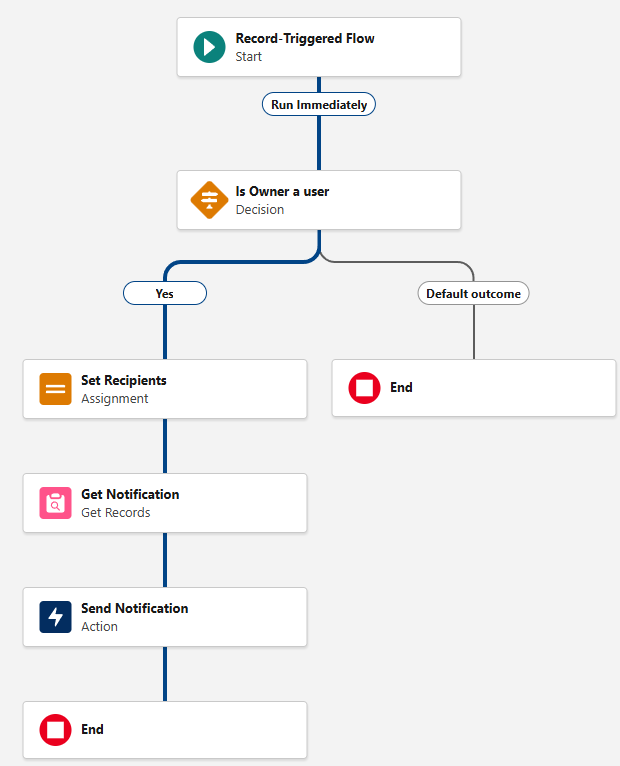
- You will end up with the following Flow
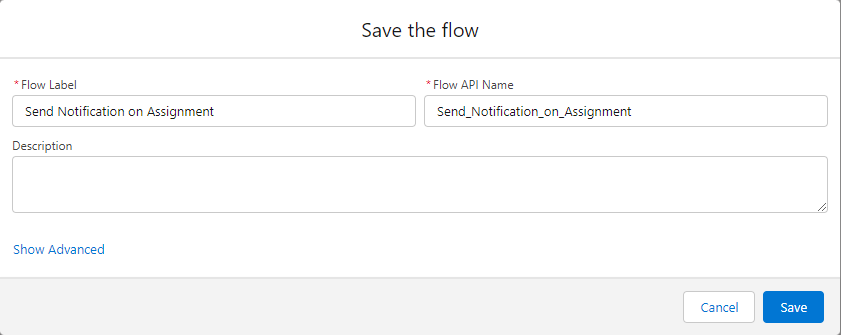
Step 9 - Save the flow
- Click Save on the toolbar
- Flow Label: Send Notification on Assignment
- Click Save
- Click Activate on the toolbar at the top to enable the Flow.
This is an example flow, it is recommended to include fault handling and fully test the flow before activating in production.
How did we do?
Slack Notifications
Custom Assignment Rejection