Team Performance
The performance page gives an overview of your team member's recent performance. This page will show the key performance metrics for each team member over your chosen time period, as well as allow yo…
The performance page gives an overview of your team member's recent performance. This page will show the key performance metrics for each team member over your chosen time period, as well as allow you to view and modify specified tag assignments. The dates for the data displayed can be altered by selecting the date picker dropdown.
Metrics
The metrics shown on the performance page are able to be tailored to your business requirements. By default, the metrics shown will be: Conversion Rate for lead teams, Close rate for Case and opportunity teams and Time to Action for any team using it. However, you can report on any numeric field from the distributed object as well as a number of other pre-defined metrics provided by Distribution Engine.
Configuring Metrics
To change the metrics displayed, click the page menu and then select ' Configure Metrics'. Here you can see the existing metrics that are displayed, in order to add a new metric, click the add new button at the bottom of the metrics list.
When adding or editing a metric, you must select whether the metric is a pre-defined Distribution Engine metric, or if you want a custom metric that tracks a field on the distributed object, or any related objectd.
For Custom Metrics, you must select a numeric, percentage or checkbox field from the distribution object that you want to report on, then select the operation to be performed on the field:
- Count - Checkbox fields only. A count of how many records have the ticked checkbox value.
- Sum - Number fields only. A sum of all the values for the chosen field.
- Average - Number and percentage fields. The average value for the field.
- Maximum - Number and percentage fields. The maximum value present for the field.
- Minimum - Number and percentage fields. The minimum value present for the field.
Pre-Defined Metrics
- Records Assigned (Count) - The number of records assigned to the user over the time period.
- Time to Action (For teams where this is enabled) (Avg, Max, Min) - If using the Action Tracking feature, this metric allows you to view the average, maximum, or minimum time taken to perform an action on a record.
- Reassignments (Count) (If enabled) - The number of reassignments made due to failed SLAs.
- SLAs failed (Count) (if enabled) - The number of SLAs failed.
- Records Rejected (Count) (If enabled) - The number of records rejected by the team member.
- Actions Tracked (Count) (If enabled) - If using the Action Tracking feature, how many actions were tracked.
- Distribution Fidelity (Count, Rate) - How many records assigned to the user during the selected time period, are still with that user.
- Hours Worked (Sum) - The hours worked column shows how many hours each team member worked over the duration. This includes shift hours, out of office and holidays. It does not consider toggle status in teams where that is enabled.
- Conversion rate (Leads only) (Rate) - The rate of leads that have been assigned over this time period that have been converted
- Close Rate (Cases and Opportunities only) (rate) The rate of cases or opportunities that have been assigned over this time period that have been converted.
- Time available (Percentage, Sum) As a percentage, this metric displays how often the user was toggled on, out of all the time that they could have been available. As a sum, this displays the total time toggled on. This metric discounts holidays and out of office as unavailable time.
Tags
Tags can be used to alter assignments based on performance. For example, you may want to weight distributions so that higher performing reps receive more records. By default, the performance page allows you to manage tag assignments from the tag collections used for tag-based weighting and tag-based caps, but this can be changed.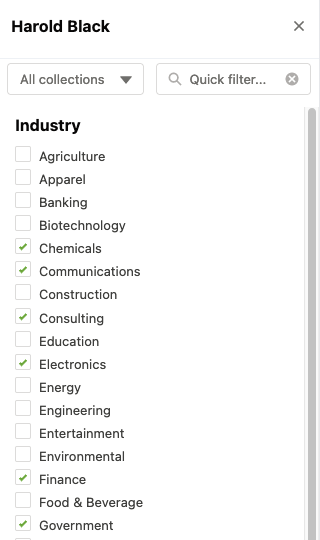
Changing a user's tags
To modify the tags for a single user, click on their row in the team performance table. This will open the tags sidepanel, which displays the tags assigned to that user, grouped by their tag collection. You can add or remove tags by clicking the appropriate checkbox next to the tags.
You can also modify the tags for multiple users by selecting the checkboxes next to the users and clicking the assign tags button. The modify assignments window will be launched. Note that any changes are applied to all selected team members.
Changing the Performance Tag Collections
To change which tag collections are shown, click the page menu and select Manage Performance Tags, you can then select from three options:
- None - This will not show any tag collections
- Weighting and Caps - This displays the tag selections (if any) used for weighting by tag and cap by tag.
- Custom - This allows you to select up to three tag collections to display.
Downloading performance data
You are able to download the performance data displayed as a CSV file. To do this, click the page menu at the top right of the page and select 'download data'.
How did we do?
Team Availability
Assignment Rejection